JanBask Training
Introduction
Amazon Elastic Load Balancer (ELB) allows you to make applications highly available through continuous health checks and even traffic distribution across multiple instances. Take an example that you have a WordPress blog running on a single t2-micro EC2 instance. When you publish this blog, it goes viral and your site gets thousands of requests together. Since you are using a single t2-micro EC2 instance, there are heavy chances that your website will crash.
So, how to manage this condition gracefully?
You may opt for the vertical scaling and launch a large number of instances like m5-large in place of the t2-micro instances. When you replace the t2-micro instance with more powerful ones, things are possible to manage gracefully. Sadly, vertical scaling is not an economical option.
Another approach is using a bunch of smaller t2-micro instances together and distributing the traffic among them. It can be achieved with the help of Amazon Elastic Load Balancer that distributes incoming network traffic across multiple targets in multiple availability zones. It uses health checks to verify which instance is healthy and able to direct traffic across other instances. Get practically ready-to-apply knowledge around architectural principles & services of AWS, design & deploy scalable robust apps over AWS, ensure AWS testing & security, and much more with our AWS Certification Courses online.
AWS Solution Architect Training and Certification
- Detailed Coverage
- Best-in-class Content
- Prepared by Industry leaders
- Latest Technology Covered

Amazon Elastic Load Balancer Types
There are a total of three types of Elastic Load Balancers, and you can use any one of them that fits your requirements the most. If you are willing to learn more about AWS, enroll in our Cloud Computing Certification course now!
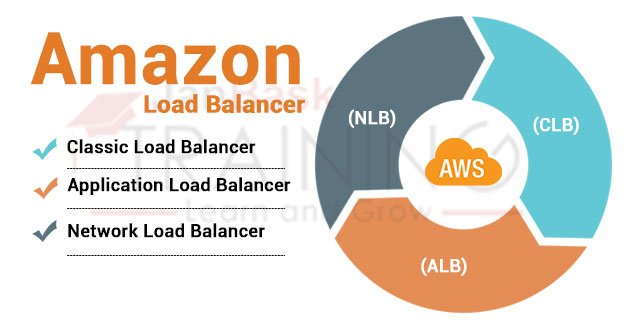
1. Classic Load Balancer (CLB)
As the name suggests, it was used traditionally for EC2-classic instances. It operates well on both levels either connection level or the request level. But it does not support features like path-based routing or host-based routing. It needs to be configured first. Once configured, it distributes the load among multiple registered instances regardless of what is available on the server currently. In this way, it is used to distribute the traffic to a single URL. EC2 forms the backbone of AWS. Get to know about EC2 and its instances using AWS.
2. Application Load Balancer (ALB)
This load balancer is mainly designed for web applications with HTTP and HTTPS traffic. It is a network-based model called the OSI (Open System Interconnection) model that is used to explain the working of computer networks. The OSI model has seven network layers in total and the top layer is Application layer.
The Amazon ELB works at the top layer; hence it is named as the application load balancer (ALB). It provides advanced routing features too like path-based routing and host-based routing. It can work with microservices and containers too. You must be wondering what we meant by the host-based and path-based routing here. Let us discuss the concepts in brief below.
Host-based Routing
Consider you have two websites janbask.com and training.janbask.com. Each website is hosted on two EC2 instances for high availability. The next step is distributing incoming traffic between these two websites. With CLB, you have to create two load balancers, one for each website. But the same thing can be done with a single application load balancer i.e. ALB. In this way, you save time and money by using a single ALB instead of two CLBs.
Path-based Routing
Consider your Company website is janbasktraining.com and the blog's page is hosted on janbasktraining.com/blog URL. Now the operation team has to decide whether the main website and the blog page should launch on the same or different instances. With ALB, you can route the traffic to the requested URL. Again, a single ALB is enough to handle both URLs together at highly manageable costs.
Get a vast knowledge of AWS and its functionalities from our blogs and resources at JanBask Training and enroll for free!
3. Network Load Balancer (NLB)
This load balancer operates at the network layer of the OSI model, so it is named as the Network Load Balancer (NLB). Consider, your Company website is running on m4-xlarge instances and you are using an application load balancer to manage the traffic among instances.
Your Company launched a new product recently and it got viral and started getting millions of requests every second. Here, ALB is not a suitable choice to manage the sudden spike in traffic. In this condition, NLB shines out of three. It has the capability to manage a sudden spike in traffic since it works at the connection level. It is able to handle static IP addresses too.
I hope you have enough ideas now about AWS load balancer key concepts and its different types. Let us go a little practical in the next section.
If you are willing to sit for the AWS Certification exam, here’s a complete guide on AWS Certification exam details.
How to create an Amazon Load Balancer?
We are taking the example of path-based routing here to manage two different paths “/” and “/blog” by creating two EC2 instances to handle each path independently. Let us get started.
AWS Solution Architect Training and Certification
- No cost for a Demo Class
- Industry Expert as your Trainer
- Available as per your schedule
- Customer Support Available

Step 1 – Launch Two EC2 Instances
To know how to launch an EC2 instance, read our blog - When launching instances given a Name tag to your instance. For the first path, add the tag NAME as the key and MAIN as the value. For the second path, add the tag NAME as the key and BLOG as the value. These values will help you to distinguish quickly between two paths. Once both instances are launched, it should look like this:

Step 2 – Install Apache server on instances
SSH into the first instance with the “Name MAIN” and run the following commands to install the Apache server on instances successfully.

After these steps, add the IP address of the instance in the browser and hit ENTER. The Apache server is installed successfully in the first instance. Now, SSH into the second instance with the “Name BLOG” and run the following commands to install the Apache server on instances successfully.


You can see that all commands are the same except for the last one. Now paste the IP address in the browser with the /blog suffix and hit Enter. The Apache server is installed successfully in the second instance.
Do you want a rewarding career in AWS? Choose the best AWS Certification for yourself and secure your future.
Step 3 - Generate Target Groups
A target group guides the load balancer which protocol and port will receive the traffic on the registered instances.
- Open the Amazon dashboard, in the left navigation bar, scroll down and click on “Target Groups”.

- Choose the option “Create Target Group” from the top. Give a Target Group “Name” and click “Create” Button.
- Now navigate to the “Targets” tab at the bottom, click on “Edit”, select the “Main” instance, click “Add to Registered” and Click “Save”.

- After this, create the second target group with the name Blog and add the blog instance to it as we did above.
To become an AWS Architect, you need to know everything about an AWS Architect salary.
Step 4 - Create or Configure the ALB
Open the Amazon dashboard, in the left navigation bar, scroll down and click on “Load Balancers”. Click on “Create Load Balancer” button on the top.
- Choose the Application Load Balancer (ALB) from available options.

- Give a proper name to the load balancer and add a minimum of two availability zones to increase the availability.
- In the next step, click the “configure security settings” option. You may see a warning message here but it is fine as we are listening to HTTP traffic here. Next, click on “configure security groups” button.

- Now select the same security group that you assigned to the launched instances earlier. Once done, click on the “Configure routing” option.

- From Target groups, select the existing target group. In the Name, select MAIN and click Next.
- Click “Next” again, review, and click Create.
Gear up for the exciting Quiz on AWS and test your AWS skills.
Congratulations, you have created an Application Load balancer with these easy steps. But we have to configure the Blog instance too, so let us continue. Don’t forget to note down the DNS name here that we need later.
- Select the “Listeners” tab and click “View/Edit rules”.
- Click the “+” sign at the top of each rule. From the Add condition, select “Path is” and type “/blog”.
- Now add action, select Blog then click Save.
- After this, we can use the DNS name of the load balancer to visit two different paths and see the final output.


Conclusion
I hope you learned something meaningful from this blog. Now you can create your own AWS Elastic Load balancer and start using it for your applications. The highlighting features of AWS ELB include high availability, automatics scaling, multiple availability zones, robust security etc that are necessary to make any application fault tolerant. Whether you want to explore your AWS skills in the I.T sector or any other domain, getting an AWS Certification course is imperative. This will help you to master AWS concepts and techniques and apply them in real life.
You can also join our AWS community for more information on trending questions about AWS.
AWS Solution Architect Training and Certification
- Personalized Free Consultation
- Access to Our Learning Management System
- Access to Our Course Curriculum
- Be a Part of Our Free Demo Class