29
DecChristmas Offer : Get Flat 50% OFF on Live Classes + $999 Worth of Study Material FREE! - SCHEDULE CALL
In this article, we will learn about how to create a tableau worksheet and format them. Worksheets are an integral process of dashboard development and play an important role. This is the reason you should know about tableau worksheets-
When we do data visualization in tableau there are majorly 3 steps involved in it. That are-
For any Tableau dashboard, creating a worksheet is the first step. Then we combine those worksheets to create the dashboard. And finally, we create a story for the presentations.
On a high level, worksheets are a single view containing graphs, shelves, and other customization options. So, worksheets are basically created for all kinds of requirements you have while data visualizations.
Let's take this scenario- The requirement is to develop a sales dashboard where we need to show the following-
Now, we need three requirements over here and so we need to create 3 worksheets. Usually, what happens, we need to create those many worksheets as the number of requirements. As we have to create 3 graphs here and so we need to create 3 worksheets. Although this is not the rule but the general trend has been like this. Sometimes, we also create more, for our own use or to make the dashboard better.
Also, it's not always recommended to use all the worksheets that you have created in the dashboard. Sometimes we also create the worksheet for our own use. The dashboard should have only those worksheets which contain certain information and make the dashboard better. Usually, when we create the dashboard, we select worksheets in a way that can convey certain meaningful information and which can generate some insights.
So, we can say that what worksheets are the first part of any tableau data visualization project. One more thing that you should note over here is while creating the worksheet, the first thing that you should do is the planning. Whenever you get the requirement directly you should not jump on creating the worksheets. First, you should idealize like how your dashboard should look like and then you should start creating the worksheets as per the plan that you have created.
Tableau Online Training & Certification

To create the worksheet, we have three options-

Apart from all these options shared above, you can also right-click on a given worksheet and select a new worksheet. All these options will work great for the creation of a new worksheet.
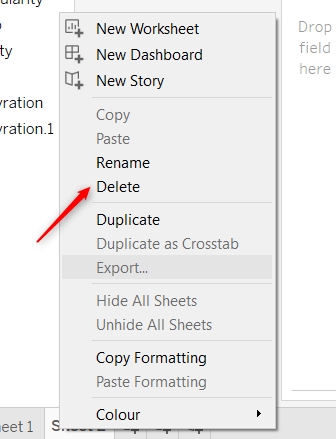
To delete a worksheet, just right click on the worksheet and select the delete option. This way you will be able to delete the worksheet you require. If you have to delete the multiple worksheets, you need to repeat the same steps as stated above.
Read: Tableau Tutorial for Beginners: A Complete Guide
You can also change the worksheet name just by double-clicking on the name or right-clicking on it and selecting the rename option.
As you can see in the below image, I have changed the sheet 1 name as Sales Trend.

You can also change the other sheets name. Usually, what will be your worksheet name the same will be the title of the worksheet. This is because in the worksheet title the attribute worksheet name will be there. If you will remove the attribute name and then again if you will change the worksheet name, then the title won't get changed. Generally, we see the worksheet name and the title name different for any worksheet. Worksheet name can be a small name that you can identify and the worksheet title will be the descriptive name which will make sense to the users.
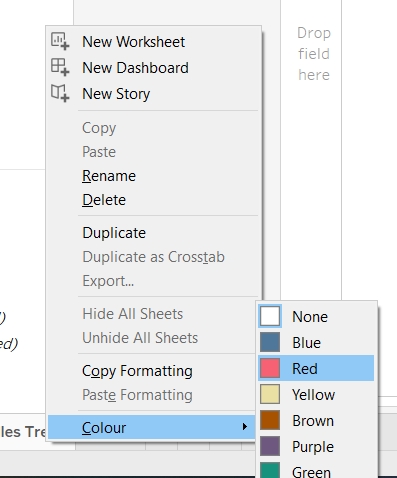
We can also change the worksheet color. Remember, these color change will be only available to the worksheet name options available over there. Usually, what happens in a particular project we can have hundreds of worksheets. And all will with the default color. Now if you want to categorize these worksheets in different categories you can divide or categories these by using different colors.
As you can see, I have changed the sales trend worksheet color as Red. You can do the same by right-clicking on the worksheet and select the color as required.
Now let's create a graph for sales Trend and then we will format that graph with the help of different options available in worksheet formatting.
To create a sales trend on the sample superstore dataset we need to drag the order date in the column self and sales measure in the row self.
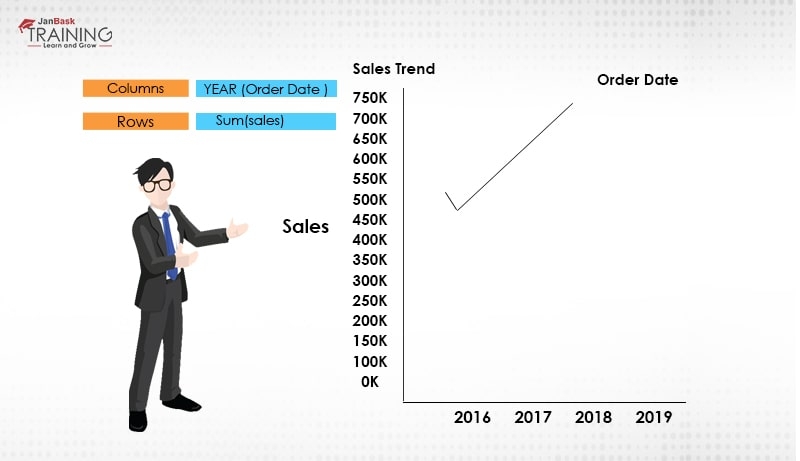
As you can see a direct line chart has been created for you. If you want this line chart to be converted into a bar chart, you can select the bar chart option from show me option.
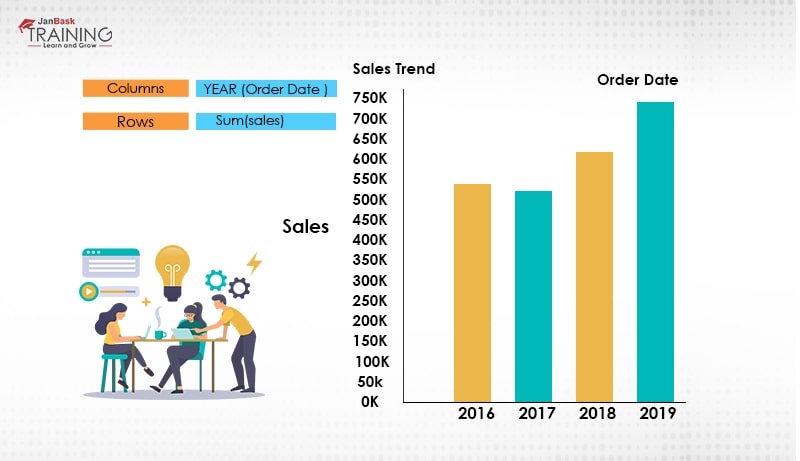
Now we have a bar chart for yearly sales Trends. If you want to provide the label name to these bars you can directly click on the T-icon showing you in the above menu bar.
If you want to change the colors of these bars you can select the color option from the left self and select the required color as per your needs.
Read: Tableau Careers - Know Why & How to Make a Career in Tableau!
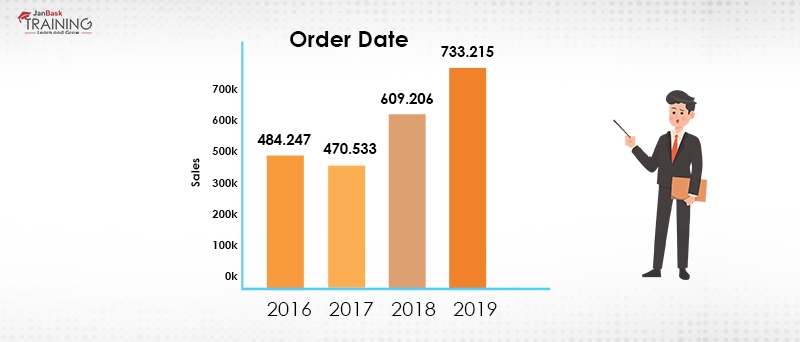
Similarly, if you want to change the size of these bars, you can select the size of the bar from the marks self and play around the different sizes. Make sure, you should not increase the size so that this bar can overlap with each other.
Currently, you can see the numbers showing you is like 484247, which can be a little difficult to read. If you want to make this like 484K, simply, right-click on it and select the formatting option. This will open a format bar in the left section. From here you can do all kinds of formatting to this bar chart.
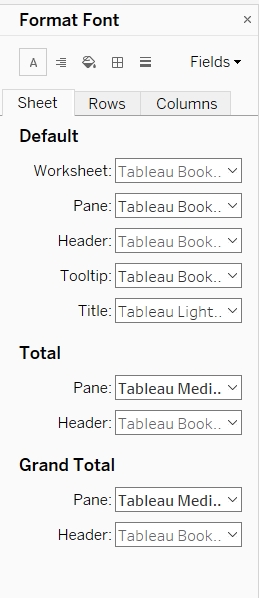
Sometime we might format a worksheet and want to copy the formatting to the other worksheet as well. If you have a similar kind of requirement, you can right-click on the worksheet and select copy formatting. This option will copy the formatting that you have applied to that particular worksheet. Now you can go ahead and paste the same formatting to the other worksheet where you want to apply the formatting of the previous worksheet. This option will save a lot of time for you while formatting the different worksheets.
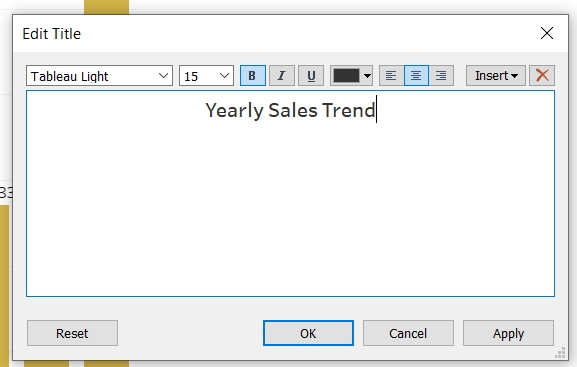
If you want to change the worksheet title directly double click on that and a pop-up option will be available to you. You can provide the worksheet title as per the name you require. You may also format this name as per the requirement is given to you from the different options available in the pop-up option. As you can I have provided the name as yearly sales trend.
You can also export the given worksheet. To do that just right click on that worksheet and select export worksheet. It will show you a pop-up option which will ask you to save that worksheet in the given format. The default format will be. twb.
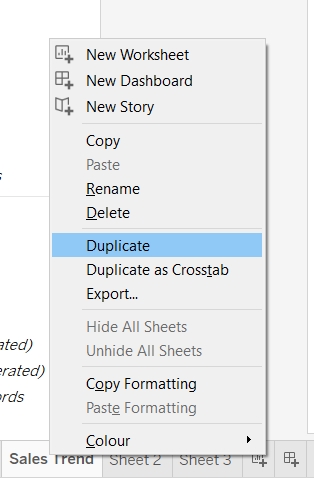
There can multiple requirements when you might need to create a worksheet that is similar to the worksheet that you have already created with some or little changes. In these scenarios duplicating a worksheet can be a better option rather than creating a new worksheet. To duplicate a worksheet just right click on it and select duplicate. This way you will have a similar worksheet created for you and then you can make the changes in that worksheet.
Sometimes, there can be a lot of things on your worksheet and you might get a little confused like what all these things are for. So, if you want to clean your worksheet one option is to start removing all the stuff one by one. But if you want to clean the entire worksheet in one go you can select a clean worksheet option that can be found in the menu bar. Shortcut for this is alt + Shift + backspace.
A worksheet that is utilized in a dashboard can't be erased, yet it very well may be covered up. You might need to shroud a worksheet on the off chance that you are imparting the dashboard to other people and would prefer not to mess the exercise manual with all the supporting worksheets.
You can hide the worksheets that are utilized in a dashboard by right-tapping the worksheet tab and choosing Hide Sheet. Remember that somebody seeing the dashboard can at present access the concealed worksheet.
It is very important for you to know how to hide a tableau worksheet because as per the analytics ‘tableau hide worksheet’ is one of the most searched items.
Read: Introduction to Data Visualization with Tableau
You can unhide a hidden sheet by exploring the dashboard that utilizes it. Select Go to Sheet on the dashboard see menu. The concealed sheet appears until you change to another sheet. At the point when the shrouded sheet is appearing, you can right-tap the sheet tab and select Unhide to unhide it for all time.
It is very important for you to know how to unhide a tableau worksheet because as per the analytics ‘tableau unhide worksheet’ is one of the most searched items.
Tableau Online Training & Certification

The tableau worksheet size cannot be specified, but the size of the dashboards can. You can simply put the tableau worksheet in a dashboard, and you can easily adjust the size. The size is usually specified in pixels, and not in inches. You'll do the math to convert properly. Remember, the text will not change the size automatically on its own.
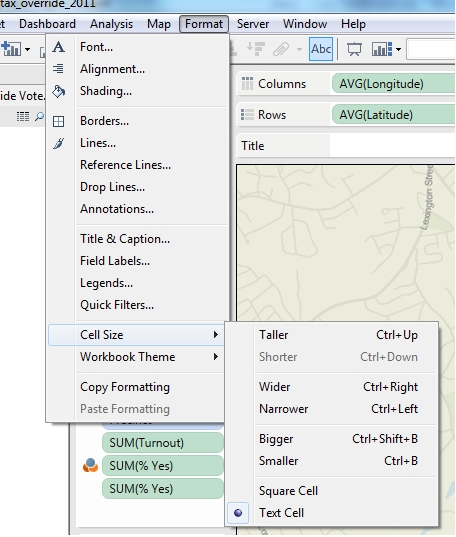
If you are looking for tableau worksheet fit to screen option then here it is -
This was all about how to create and format a tableau worksheet. Here we have seen how to create worksheets in different ways than the different customizations options available with the worksheets and then formatting of the graphs available on the worksheet.
Tableau Online Training & Certification

I would recommend you go through this article and create the worksheet as per your requirement. If you face any difficulty while creating the worksheet please comment here.
 Pinterest
 Email
Email
The JanBask Training Team includes certified professionals and expert writers dedicated to helping learners navigate their career journeys in QA, Cybersecurity, Salesforce, and more. Each article is carefully researched and reviewed to ensure quality and relevance.

Cyber Security

QA

Salesforce

Business Analyst

MS SQL Server

Data Science

DevOps

Hadoop

Python

Artificial Intelligence

Machine Learning

Tableau
Search Posts
Related Posts
Receive Latest Materials and Offers on Tableau Course
Interviews