02
JanChristmas Offer : Get Flat 50% OFF on Live Classes + $999 Worth of Study Material FREE! - SCHEDULE CALL
Just to revise, In the last blog we study about different Jenkins management properties like user, security, plugin and credentials. Now, let’s proceed to check how to configure different tools in Jenkins. Mainly, for any CI/CD process, we require to configure
Basically, Jenkins configuration for this require two pages mainly
So, Let’s start
DevOps Training & Certification Course

JAVA configuration is required because of multiple reasons
First, proceed to Jenkins → Global Tool Configuration, there is one block “JDK”. Click on “Add JDK”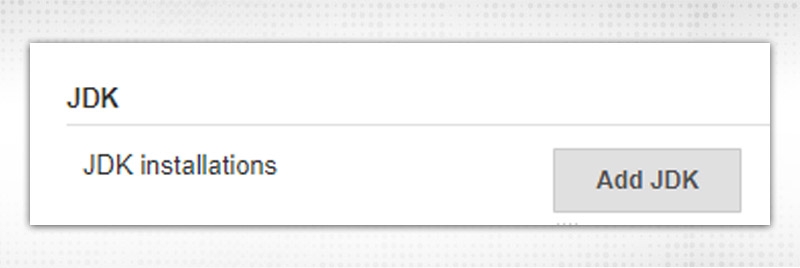
It will explode to several Jenkins configuration fields for JAVA:
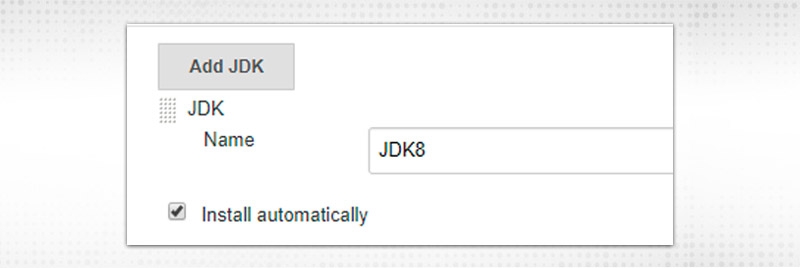
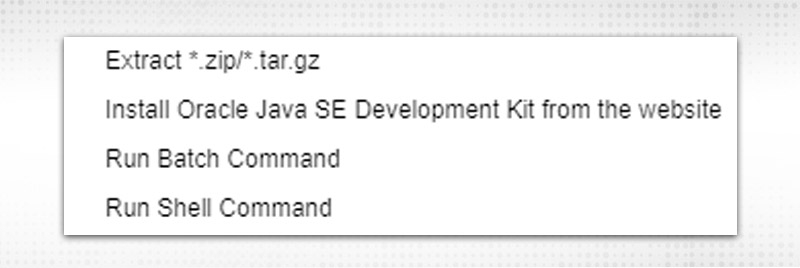
I. Extract *.zip/*.tar.gz
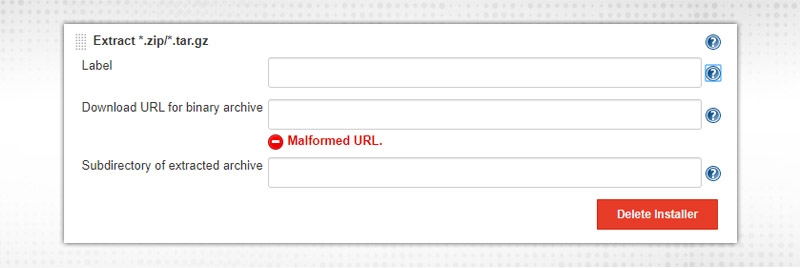
Label is an optional field, Nodes which validate this expression will be allowed to install. Enter the zip/tar.gz URL to download from and the “Subdirectory” field is also optional where to unpack the archive and download tool.
II. Install Oracle JAVA SE Download Kit from the website
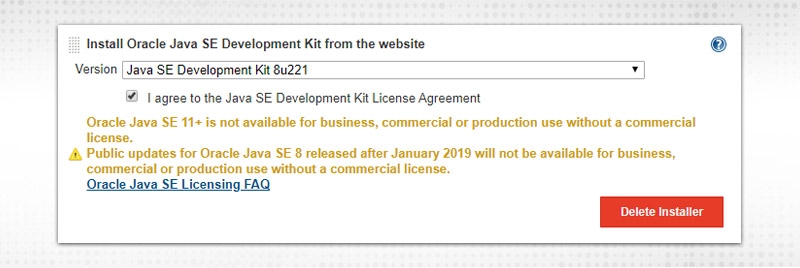
Select the Version, Agree to Terms, Login to Oracle and you are done !!
III. Run Batch command
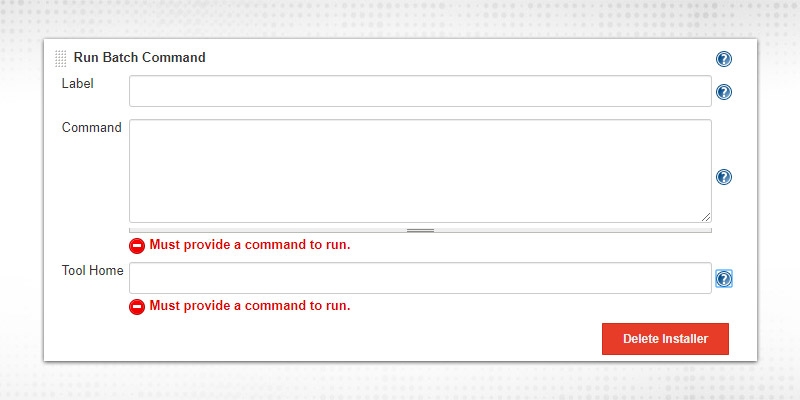
The label field is optional to restrict the command to run on nodes validating this label. The command is the command used to run batch scripts for installation. Tool Home is resulting home directory of installed “tool”
IV. Run Shell command
Same as “batch” except it will execute a shell script.
c. If “Install Automatically”, not selected
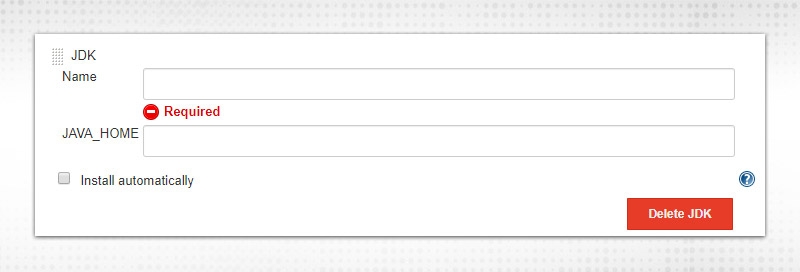
Just provide JDK name (User Defined) and JAVA_HOME (Directory where JAVA is installed). If multiple versions are installed, Add different JDKs with different names to re-use that name in required Jenkins jobs.
After Configuration, let's see it through a demo. Create a new project by going New Item → Freestyle Project
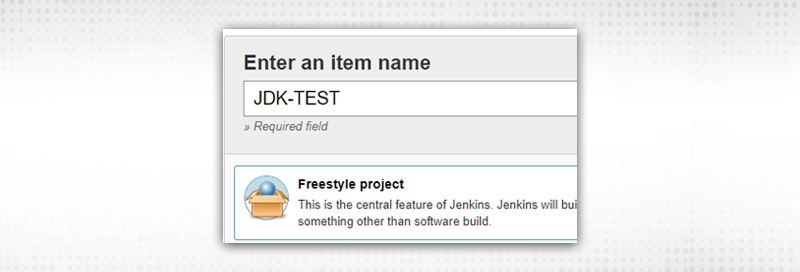
You will be able to see JDK selection configuration only when multiple JDK configurations. For this Demo, I have created two JDK with name JDK8 and JDK9

It will have three drop-down:
Let’s test console output by selecting each. In Execute Shell block under “Build Step”, write
java -version
Check Console output. It will print system provided JAVA details
Select JDK8 from the list, Save and “Build Now”
Now, Select JDK9
Let’s take another demo of using pipeline jobs. Update Jenkinsfile with the appropriate tool you want to use and it will execute accordingly as per requirement. Create a “Pipeline” project.
Select “Pipeline Script” and write sample Jenkinsfile
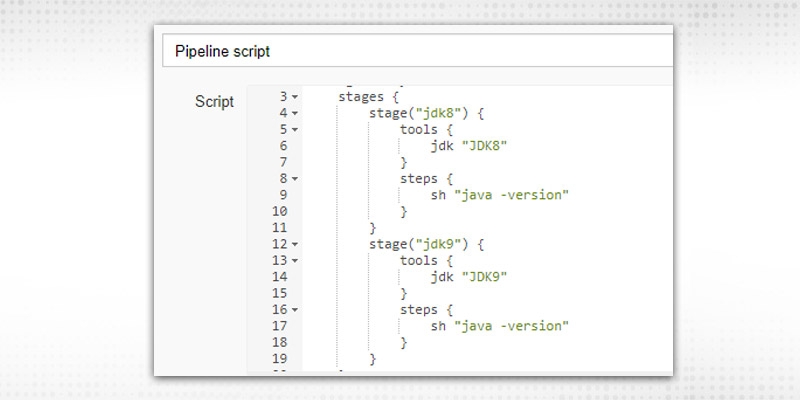
Build now and check Console output:
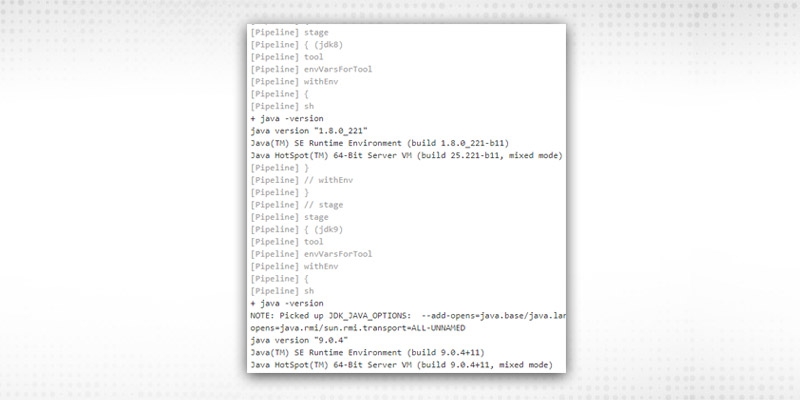
Git configuration in Jenkins is quite easy. Git configuration in Jenkins is required to integrate Source Code with our CI/CD process.
Once Installed, check the Jenkins configuration for JOB, you will be able to see “Git” as an option in Source Code Management section for git configuration:
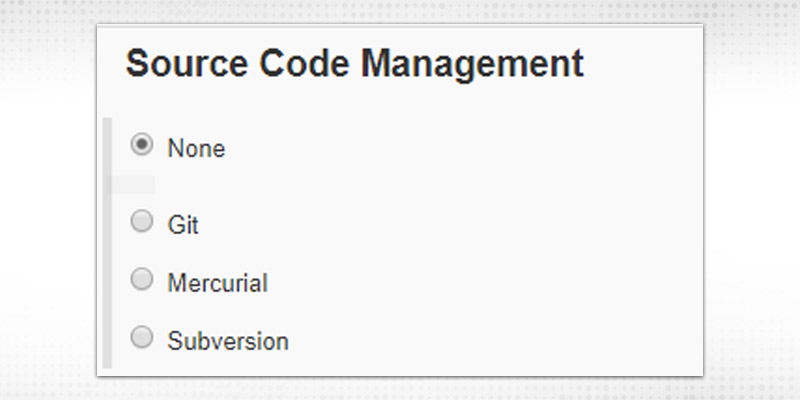
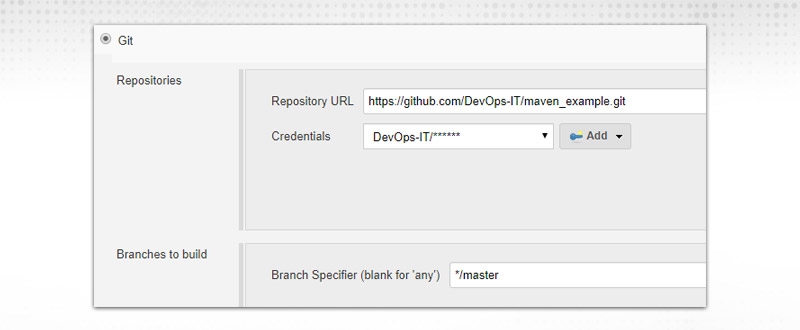
Let’s try the usage with a demo. Create a new freestyle project. Select “Git” in Source Control Management.
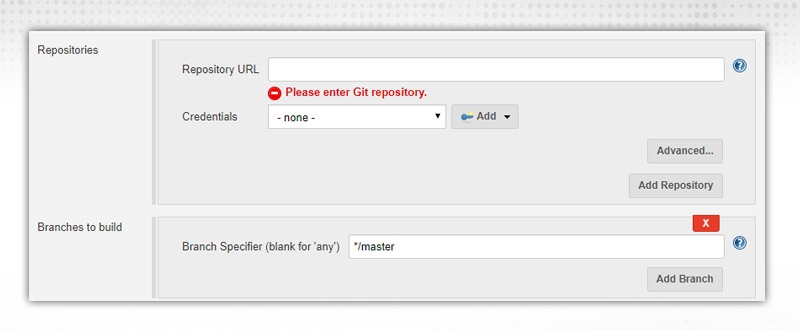
Enter “Repository URL”. Credentials required to connect, if present, then select from list otherwise Click “Add” to add credentials. “Branch Specifier” by default is “master”, but you can mention another branch also if you want to build from that.
Click “Build Now” and check console output
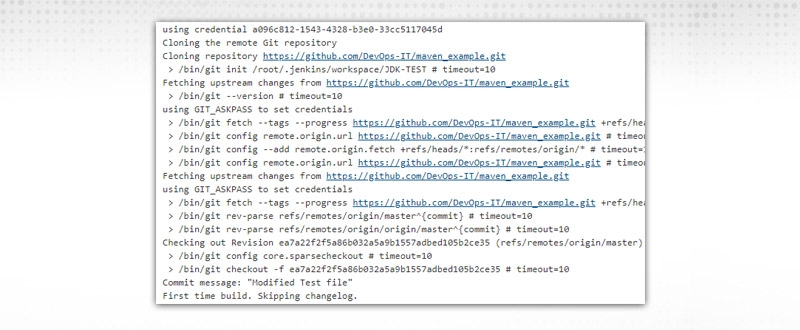
As you can see, Job performed multiple git commands executed using credentials provided to connect and checking out the git repository. So, our git configuration is working. You can check from Workspace also, whether everything is checked-out or not.
Some steps to troubleshoot:
https”, provide correct SSL certificate or make sslVerify=false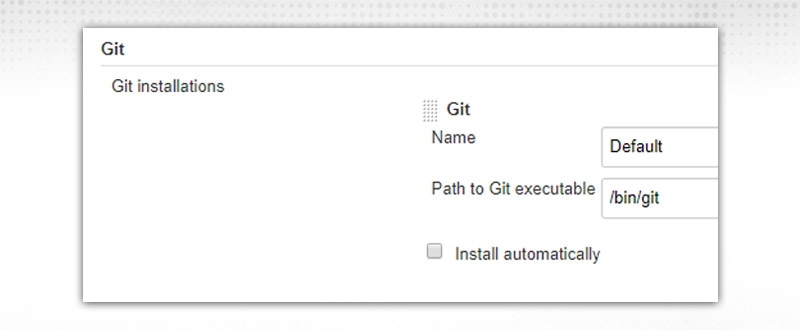
Let’s demo usage in pipeline jobs, Create a new pipeline(or multibranch pipeline) job, Select “Pipeline script from SCM” to read Jenkinsfile from SCM to perform build, test, deploy stages on the code present in the repo.
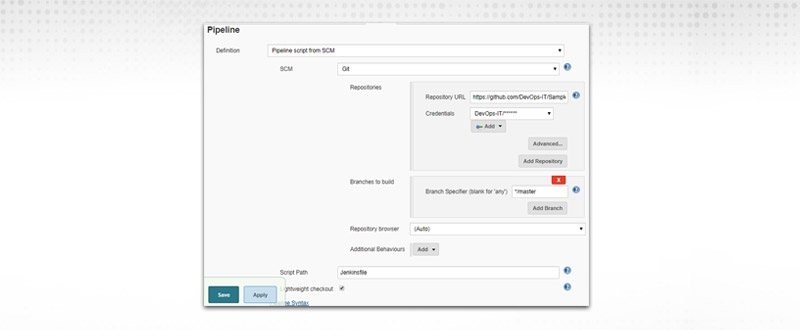
Fields are the same, it will checkout code from that repository, search for Jenkinsfile at root path and then execute it.
Save → Build Now and check console output. You will see several stages perform its operation. Dashboard view would be:
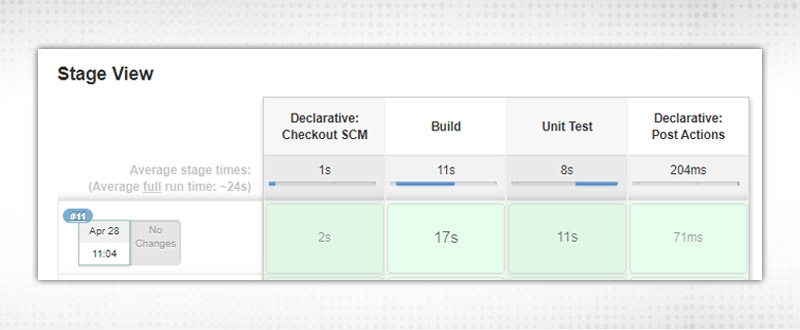
More git configuration management is required if you want to perform various operation depending on your job or requirement
You must be working on one of the repository management tools from Github, Gitlab or Bitbucket. Different plugins will be available for these tools depending on the task. It will be the same for all but here, we will be discussing Github.
Install “Github Branch Source Plugin” which will help you in Multibranch Pipeline jobs, whenever any push or PR is created. This is required to check that your PR/Branch is in working condition and will not break the “master” code.
You can get more information in Git workflows documentation and will create more settings about these types of jobs in coming blogs.
Install “Github Plugin” for normal integration with Jenkins
Proceed to Manage Jenkins → Configure System. Search for Github
Provide Github Servers, if any or let it be just like that. It is required if you want your Jenkins to manage webhooks from Github server.
In your Jenkins job also, you will be seeing Github for git configuration

Under Build Triggers, to trigger hook when SCM polling finished

Github webhooks will be covered for “Multibranch pipeline jobs” and will be explained in the next blog.
Now, the third most important thing is to build tool configuration, and most popular build tools across organizations are:
We will discuss the Maven configuration. But to note, the configuration of both the tools are the same, it's just like two different tools, so different plugins name and different configuration. Both can be replaceable on the same grounds.
Plugin required for Maven Install is from Manage Jenkins → Manage Plugins
a. For Maven configuration
b. For Gradle

Add tool details in Manage Jenkins → Global Tool Configurations
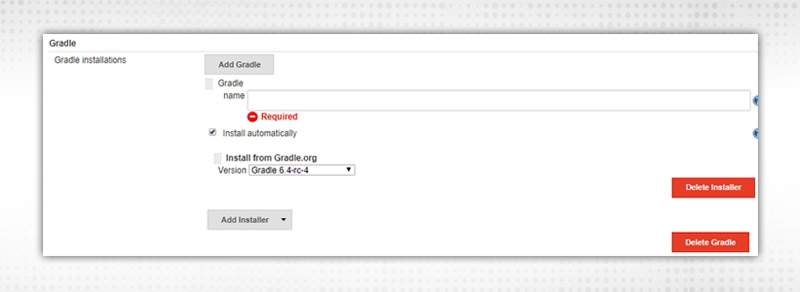
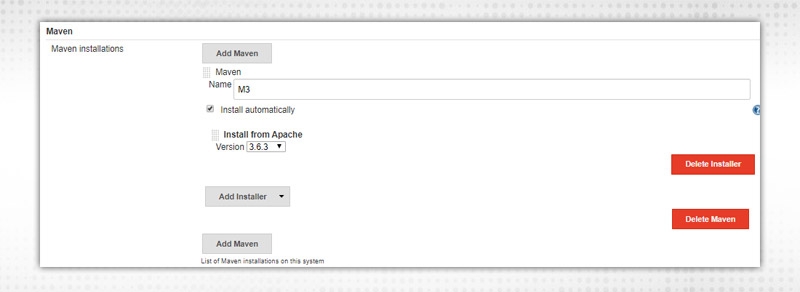
Both the tools configured on similar lines like we installed JAVA like we set up GIT. Here, I did Maven configuration with the name “M3” and will use it in my Jenkins jobs. In this also, if Installer selected, then for maven install, add required installer. For different maven options, add respective Maven Install and use.
For maven configuration, proceed to Manage Jenkins → Configure System

Place MAVEN_OPTS which will be available globally to the whole Jenkins. The default location of the Local Maven repository is ~/.m2/repository but can be entered locally to the workspace of the executor of the node.
Let’s start with a demo and will see configurations from Job’s configure window as well.
Create New Freestyle Project → Configure. Select “Invoke top-level Maven targets” from Build step for Maven(“Invoke Gradle Script” for Gradle)
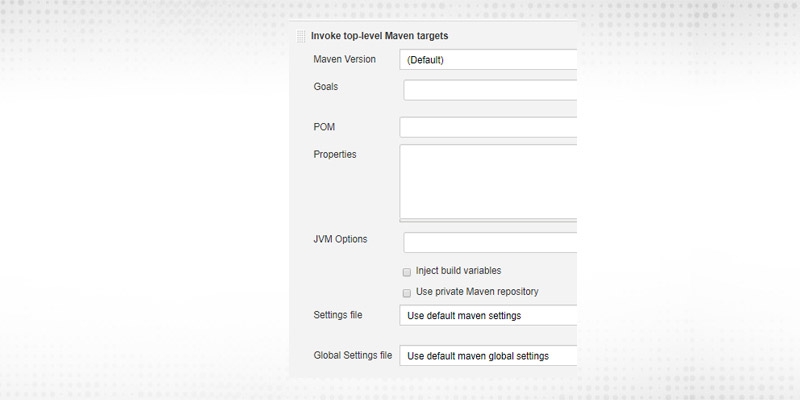
Select
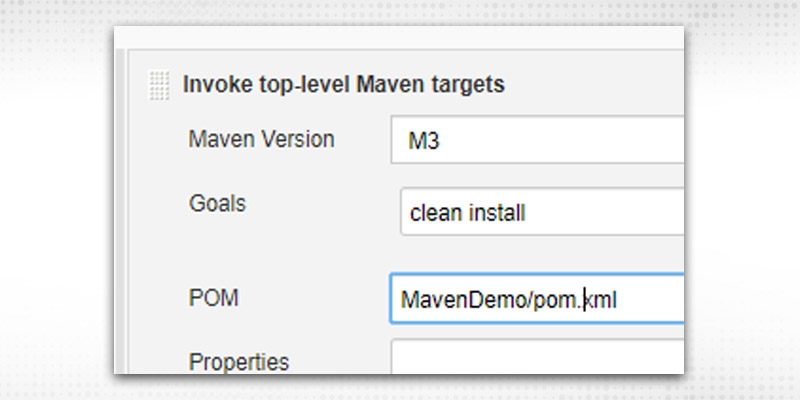
By default, these two settings compulsory
Now, it will execute “mvn clean install” on the source code pom.xml file mentioned in Git repo. Click Save → Build now and check console output:
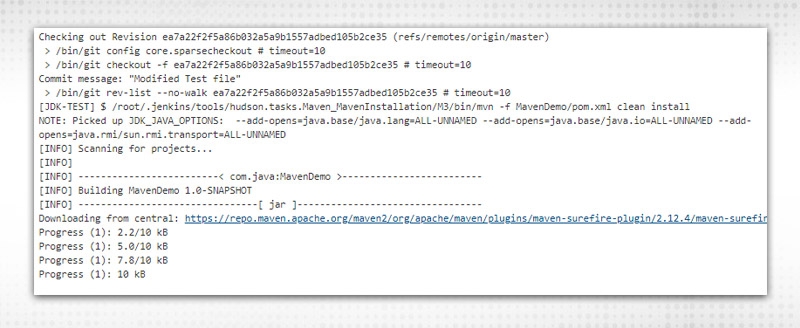
Check the steps: Source code is checked-out, executed maven command “mvn clean install” as specified in the configuration.
Let’s include Maven configurations in our Jenkinsfile. Create a new pipeline job. Sample Jenkinsfile will look like:
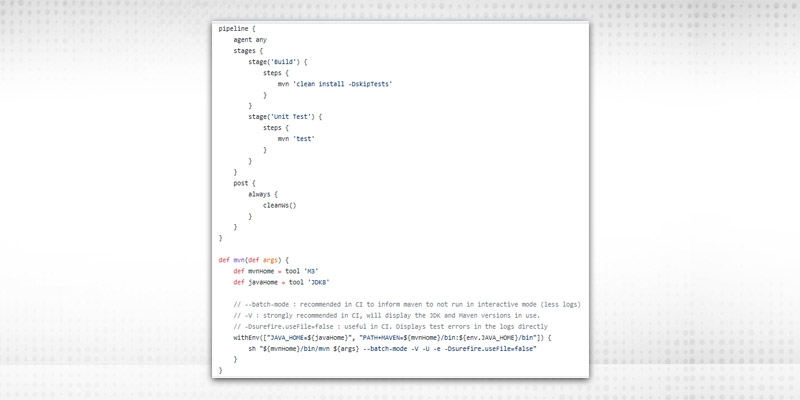
It will use JDK8 and M3 variables(created using maven install) which are set up in “Global Tools Configuration” and that will be used during the run. Click Save → Build Now
Check Console output. I am giving screenshot having both the versions defined and stages:

A PIpeline is completed successfully with all stages completed. This is how to build tool used in pipeline jobs
Now, we configured the basic necessary tools required for the CI/CD process like git configuration management, java configuration and maven configuration. Please let me know if you faced any issue while configuring it. In Next blog, we will set up a full-fledged multibranch pipeline job. See you soon !!
 Pinterest
 Email
Email
The JanBask Training Team includes certified professionals and expert writers dedicated to helping learners navigate their career journeys in QA, Cybersecurity, Salesforce, and more. Each article is carefully researched and reviewed to ensure quality and relevance.

Cyber Security

QA

Salesforce

Business Analyst

MS SQL Server

Data Science

DevOps

Hadoop

Python

Artificial Intelligence

Machine Learning

Tableau
Search Posts
Related Posts
Receive Latest Materials and Offers on DevOps Course
Interviews