10
JanNew Year Special : Get 30% OFF + $999 Study Material FREE - SCHEDULE CALL
In the last blog, we discussed the Jenkins pipeline, it’s benefits, features, and requirements with a practical demo. Let’s proceed with different aspects of managing or administering Jenkins. In this blog, we will discuss different Jenkins management property
Different Jenkins management property are:
Managing each Jenkins management property will take a good discussion in itself.
Now, Why plugins are essential? Plugins basically help us in integrating 3rd party tools with Jenkins which will amplify the Jenkins performance.
Jenkins consists of thousands of plugins to unite different tools(build/analysis/test/deployment), cloud providers, SCM(Github/Gitlab/Bitbucket/SVN), etc. Like in previous blogs also, we installed various plugins, e.g. “Blue Ocean” enhanced Jenkins dashboard view for pipeline jobs.
Let’s discuss in detail:
1. Proceed to Manage Jenkins → Manage Plugins

2. Observe four tabs:
Let’s discuss each tab.
3. Select any plugin(s) under the “Updates” tab.
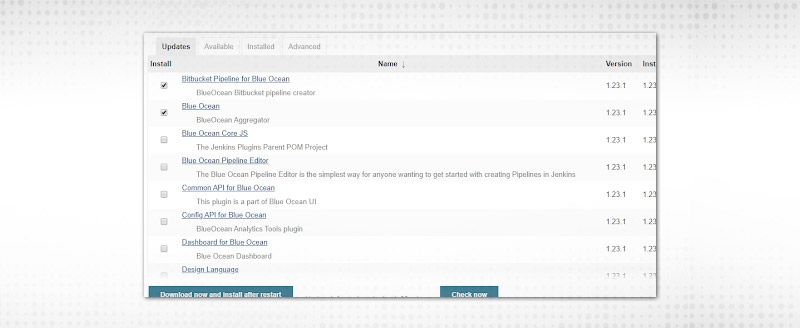
4. Click on “Download now and install after restart".

5. You must be wondering, that I selected two only and Jenkins installed so many plugins. A plugin is internally dependent on many other plugins, it’s like layers defined. So, updating the plugin will verify all dependency updates and update whichever is ready.
6. Now, plugins have been updated and are “ready to use”, once Jenkins is restarted.
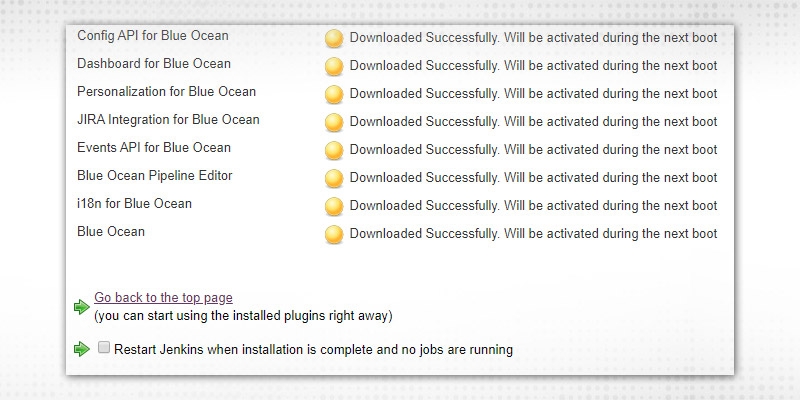
7. This can be verified by scanning the “Installed” tab. The updated version installed is “1.23.1” which can be verified from the above screenshot also.
Blue Ocean plugin is refreshed and can be downgraded to the last version as well by clicking on “Downgrade to 1.23.0” which is useful as some jobs might rely on an older version and if updated for single purpose, it can break other jobs. So, older versions can be recovered.
8. Now, “Available” tab. “Sonarqube Scanner” plugin is unoccupied. Let’s see how Jenkins will enhance after plugin installation, proceed to Manage Jenkins → Global Tool Configurations:

No Sonarqube here.
9. Select “Sonarqube Scanner” from “Available”.

10. Click on either of the Install alternatives, install the plugin and it will come under the “Installed” tab. Choose “Install without restart” as it does not require Jenkins to restart every time.

11. The plugin is established and so all dependencies. You can verify the same in the “Installed” tab
“Uninstall” button will be visible in the “Installed” tab.
12. Now, proceed to “Global Tools Configuration”, Sonarqube scanner configurations buttons available:
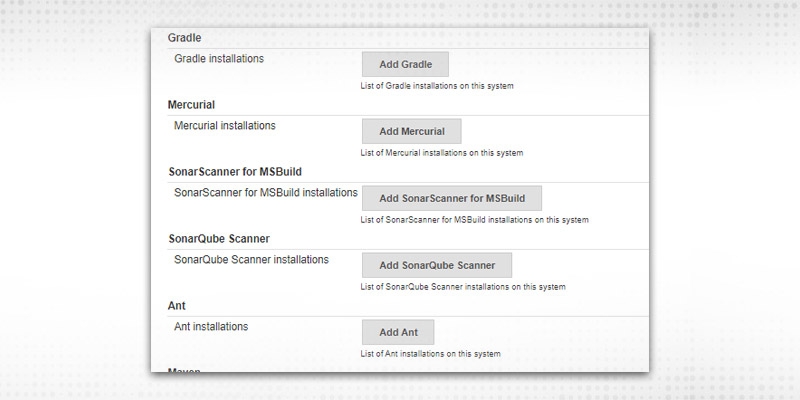
13. Let’s verify “Advanced”.
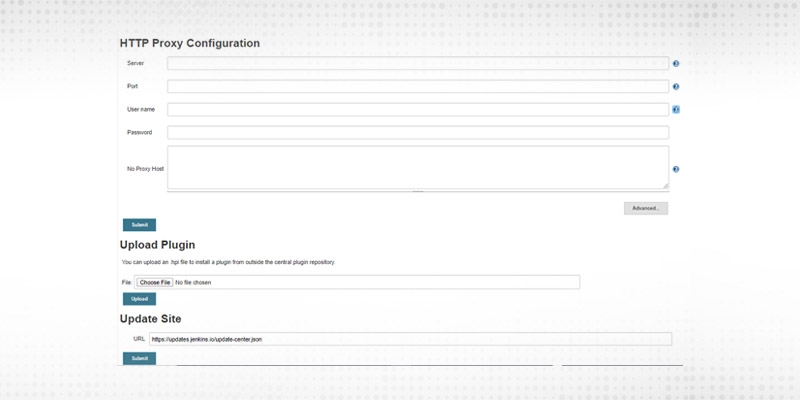
14. “HTTP Proxy Configuration” is essential if Jenkins is running behind a proxy and not able to link to the internet directly. Proxy detail fields are self-explanatory.
15. “Upload Plugin” is needed if you want to install a specific version of a plugin, download required “.hpi”(format of Plugin files) file and upload from here.
16. Let’s say, I want to install the 1.1.8 version of “Bitbucket” plugin. Go to archives list:
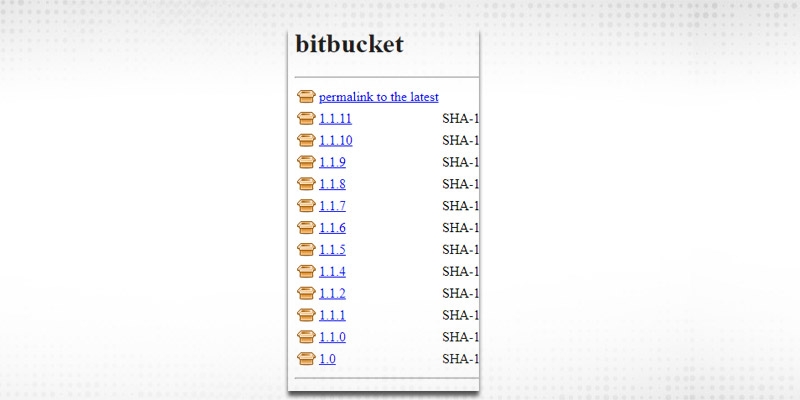
17. Click on 1.1.8 and it will download .hpi file.
18. Click on the “Choose File” option of upload plugin, select the required file and “Upload”.
19. After upload, check-in “Installed” tab and verify the “Bitbucket” plugin with version
Let’s proceed with other Jenkins management property
Normally, a Jenkins instance is shared across multiple teams or multiple projects. Nobody should be allowed to mess up other's work e.g. project A should not build project B’s Jenkins jobs. In a project we have
Developers/testers should not be having the right to administer Jenkins, one way to imply security. So, let’s discuss Advanced Security features.

Security Realm -- has the design to validate Jenkins on the basis of user information as how and from where to drag that information.
“Disable remember me” -- If checked, will deactivate the remember me choice and password will not be saved.
Under “Security Realm”, different choices available:
a. Delegate to servlet container -- Users will be validated using servlet container like Jetty.
b. Jenkins’ own user database -- Whatever users created on Jenkins will appear in its database and use for validation. If “Allow users to sign up” is checked, it will let fresh users to sign up
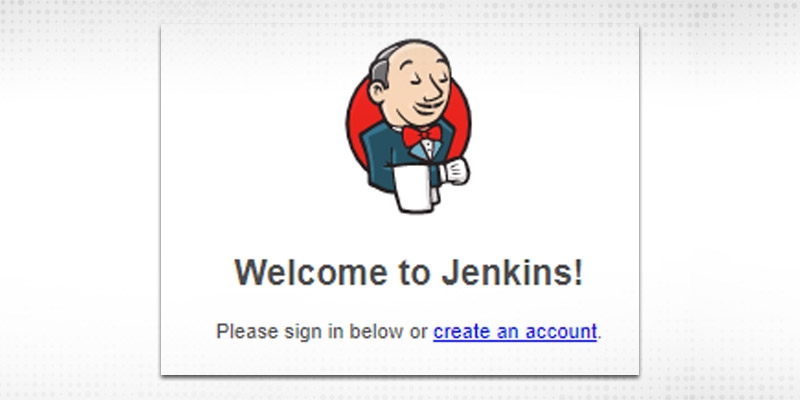
See “create an account” option during log-in.
c. LDAP -- If the LDAP server is designed, Jenkins will delegate login information to that server.

d. Unix user/group database -- represent the validation mechanism to the Unix user database. With this chosen, users can sign-in to Jenkins utilizing UNIX OS credentials.
e. None -- will not set any validation for Jenkins.
Now, “Authorization”
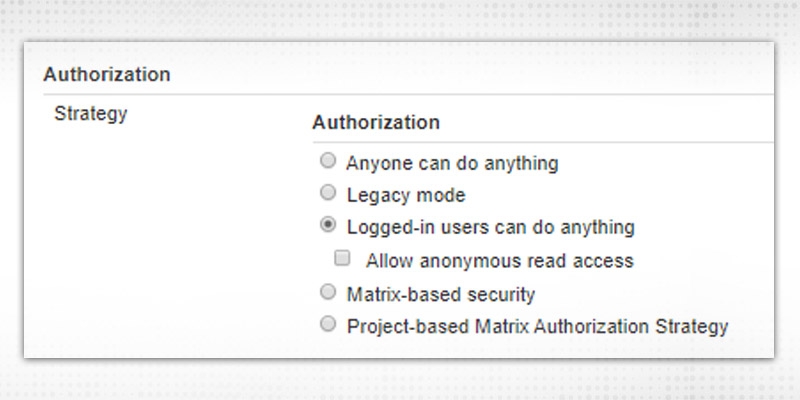
Authorization is about what action the user is authorized to execute on Jenkins. Different available options are:

Two user/groups present
You can remove and append new users as per requirement. Add any new user by clicking on "Add user" and give the suitable authority like for Overall or Credentials etc.
Project-based Matrix Authorization Strategy -- This is an addition to "Matrix-based security" that permits extra ACL matrix for each project independently. In short, the end result will be like a user can access project X, Y but not Z.
Other Security configurations:
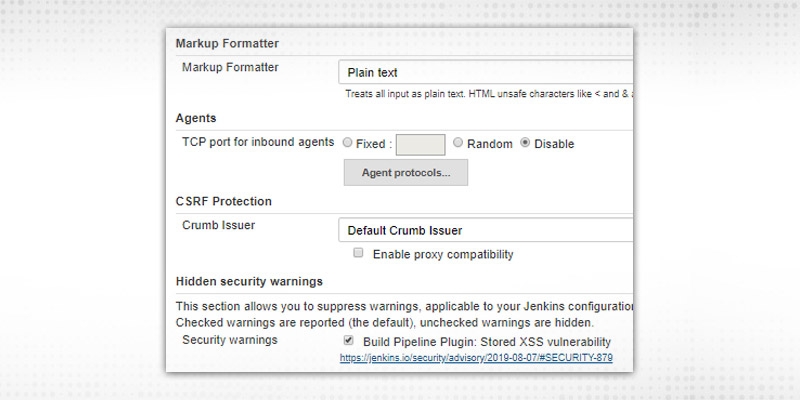
a. Markup Formatter -- This has options “Plain Text” and “Safe HTML”. Normally, Plain text as it will treat all inputs as plain text and will escape ‘<’ and ‘&’ characters.
b. Agents -- By default, it is “Disable”. Normally, it was required to converse with inbound agents, like JNLP. A fixed port will help in governing firewall rules and Random will be chosen by Jenkins based on availability to shun any conflicts.
c. CSRF protection - It is by-default enabled and required to save cross-site attacks.
d. Hidden Security Warning -- If required to hide or suppress any security warnings. It comes from update sites and related to currently installed plugin/components. Warning can be hidden by unchecking the box. These warnings will be visible in “Manage Jenkins” page.

Some more:

a. API Token -- As we can see from the list itself, 2 legacy options are “Not recommended”. Jenkins users can check if they have any unused or outdated API tokens.
b.Agent → Master Security -- This is like trust certificates between master Jenkins and agents. Rules can be tweaked by clicking link
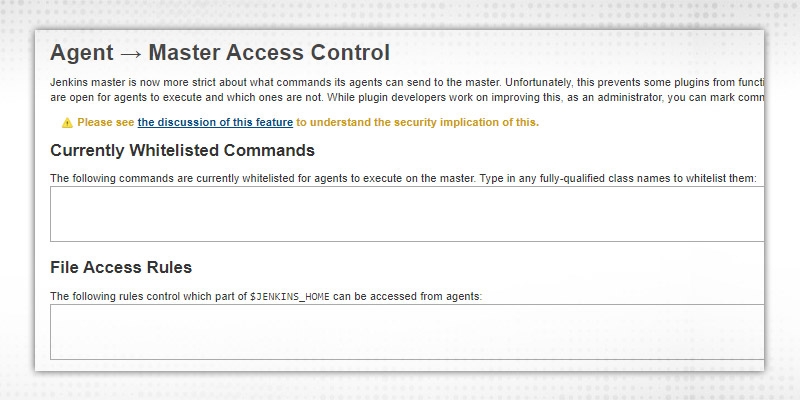
Whitelist commands and File Access rules updated for requests sent by agents to master.
c. SSH server -- Same as TCP port, but for UNIX/LINUX machines.
In normal set up, Authentication/Authorization configuration is required, rest can be put as default.
Another Jenkins management property
Go to Manage Jenkins → Manage Users.

Note:- Manage Users' choice is accessible only when “Jenkins’ own user database” selected in the ‘Configure Global Security' section.
Press “Create User” to create a fresh user under Jenkins user management property.
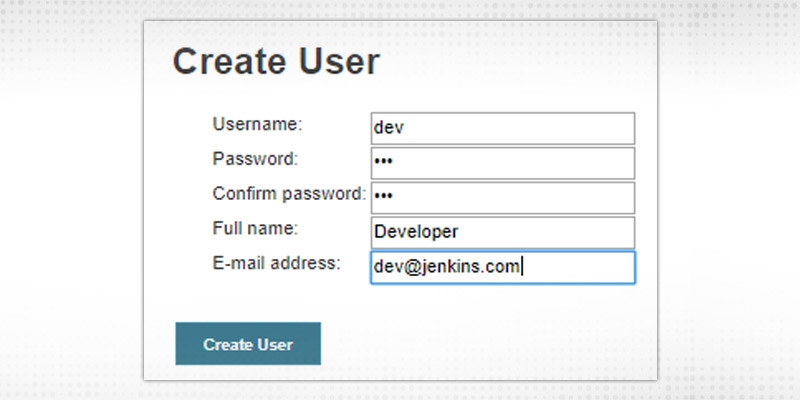

Configure user by clicking “wheel” icon in front of username
API Token is required to make way for authenticated API calls with different applications.

Click on “Add new Token” and then Generate. A token will be created which can be used in other applications to make secure authentication. Copy token and use it.

The following information can be updated:
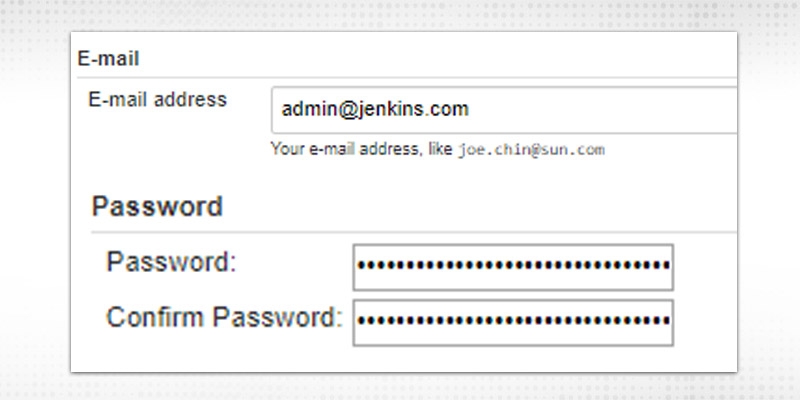
Select which UI you want to view after clicking the notifications from email/slack/github etc. Options are:
List of SSH keys which help in running Jenkins CLI
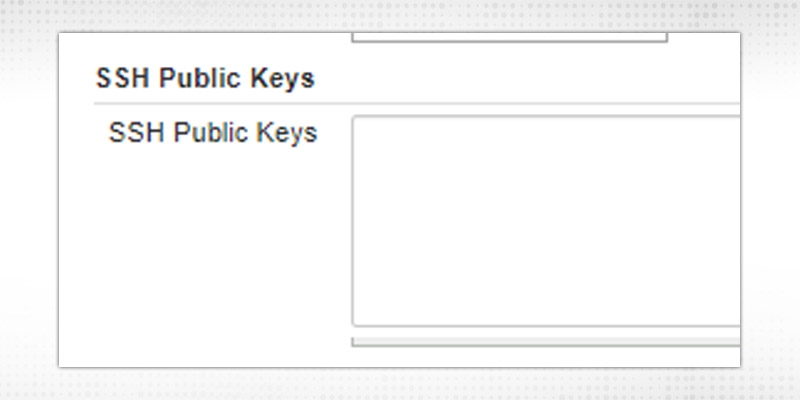
Session Termination will terminate all sessions of current users from all connected devices.
Choose your preferred time zone.
Let's test in Authorization Strategy, Select “Matrix-based security” and add both the users with selected permission e.g.

Admin - Administer permission
“Developer” - Overall Read permission and can build/cancel/read JOB but not configure/delete etc.
Similarly, multiple users can be added to enhance security.
CK on “Add”, you will get similar kinds of options and fill the required fields. All credentials added here also will be visible in the “Credentials” page.
Credentials stored are required to authenticate third-party tools during run time.e.g. SCM credentials (Github, Bitbucket)
Go to Manage Jenkins → Manage plugins, Install following plugins, if not installed.

Select “Credentials” from the left side of the dashboard, it will open the already defined:

To add Global Credentials, click on Credentials → System from left side:

Click on “Global Credentials” → Add Credentials
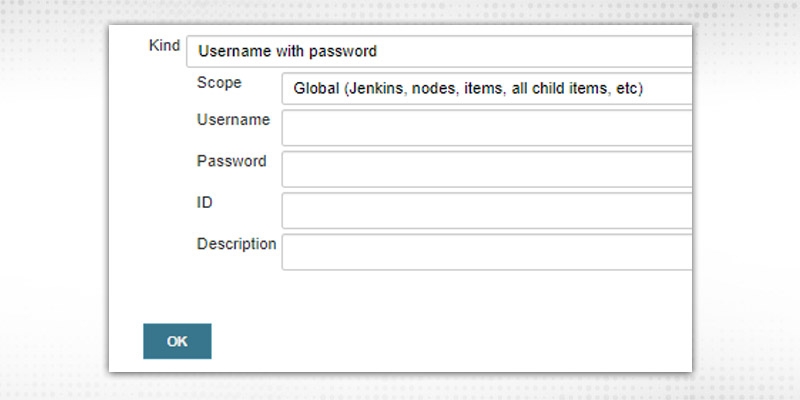
Now, All fields depend on the “Kind” choice
a. “Username with Password”, enter Username/Password in respective fields required for connection. Fill the ID field or it will be auto-populated(Once added). “ID” will be used in Jenkins jobs(e.g. pipeline) to connect.
b.“SSH Username with Private Key”
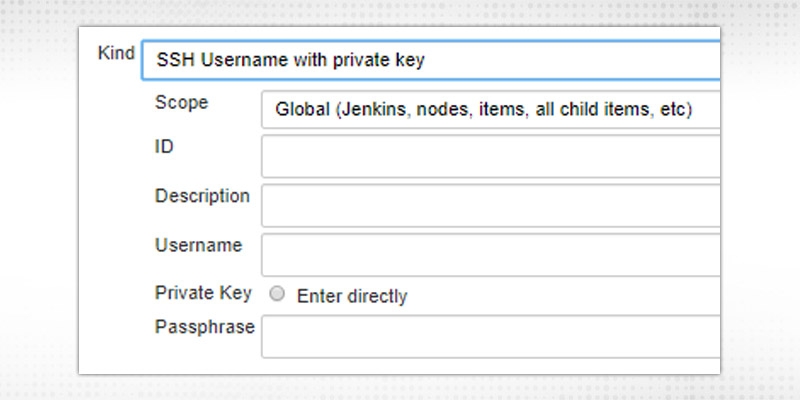
Provide details entered while generating public/private key pairs.
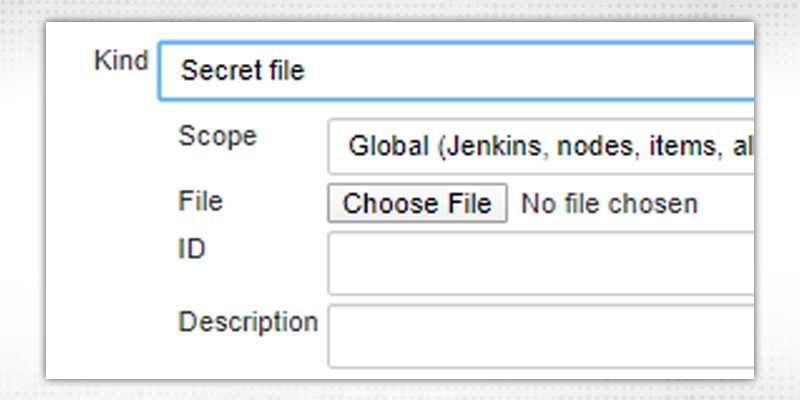
c. “Secret File”, upload file containing secret contents
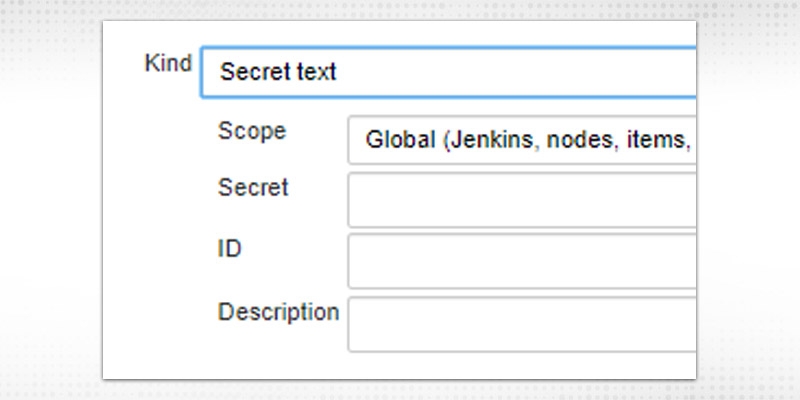
d.“Secret Text” -- enter the secret, token or API token (like Gitlab access token)
e. For “Certificate”, upload PKCS#12 certificate with an optional password.
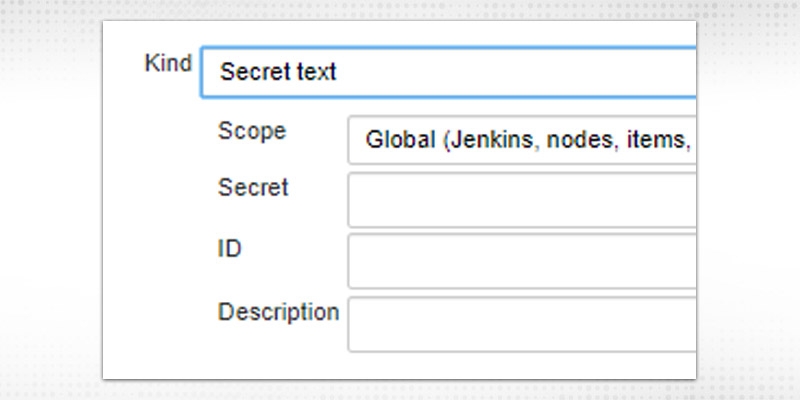
“Scope” field will have options: “Global” and “System”. Global will be available with whole Jenkins topology and System will be available within Jenkins and its nodes only.
The description field is to describe the type of credential.
Click OK to save credentials.
From Jenkins job also, you can specify credentials
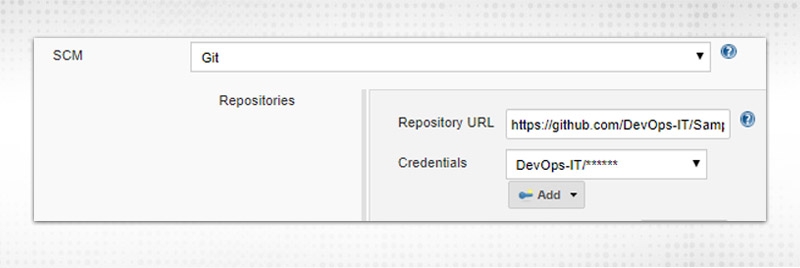
Click on “Add”, you will get similar kinds of options and fill the required fields. All credentials added here also will be visible in the “Credentials” page.
This is how we can manage plugins, users, security and credentials which are like four pillars of Jenkins system. Please let me know your different Jenkins management property experience in feedback. See you soon !!
 Pinterest
 Email
Email
As an experienced DevOps professional, I am having a good understanding of Change and Configuration Management as well. I like to meet new technical challenges and finding effective solutions to meet the needs of the project. I believe in Sharing is Learning.

Cyber Security

QA

Salesforce

Business Analyst

MS SQL Server

Data Science

DevOps

Hadoop

Python

Artificial Intelligence

Machine Learning

Tableau
Search Posts
Related Posts
What is Chef Programming Language? Chef Tutorial Guide for Beginner
![]() 248.6k
248.6k
DevOps Engineer Salary in India – What You Really Need to Know
![]() 5.2k
5.2k
A Comprehensive Guide on the Latest Trends of DevOps Engineer Resume
![]() 495.8k
495.8k
What is Docker? Docker Commands Cheat Sheet with Example for Ubuntu
![]() 612k
612k
Top 7 DevOps Tools: Manage & Optimize The Organizational Task
![]() 500k
500k
Receive Latest Materials and Offers on DevOps Course
Interviews